Apply/Remove the Schedule Template to a Merchant(s)
Navigate to Merchant & Device.
After creating a schedule template, users need to navigate to the Merchant & Device page to apply the schedule template to the selected devices.
Steps to Apply a Schedule Template
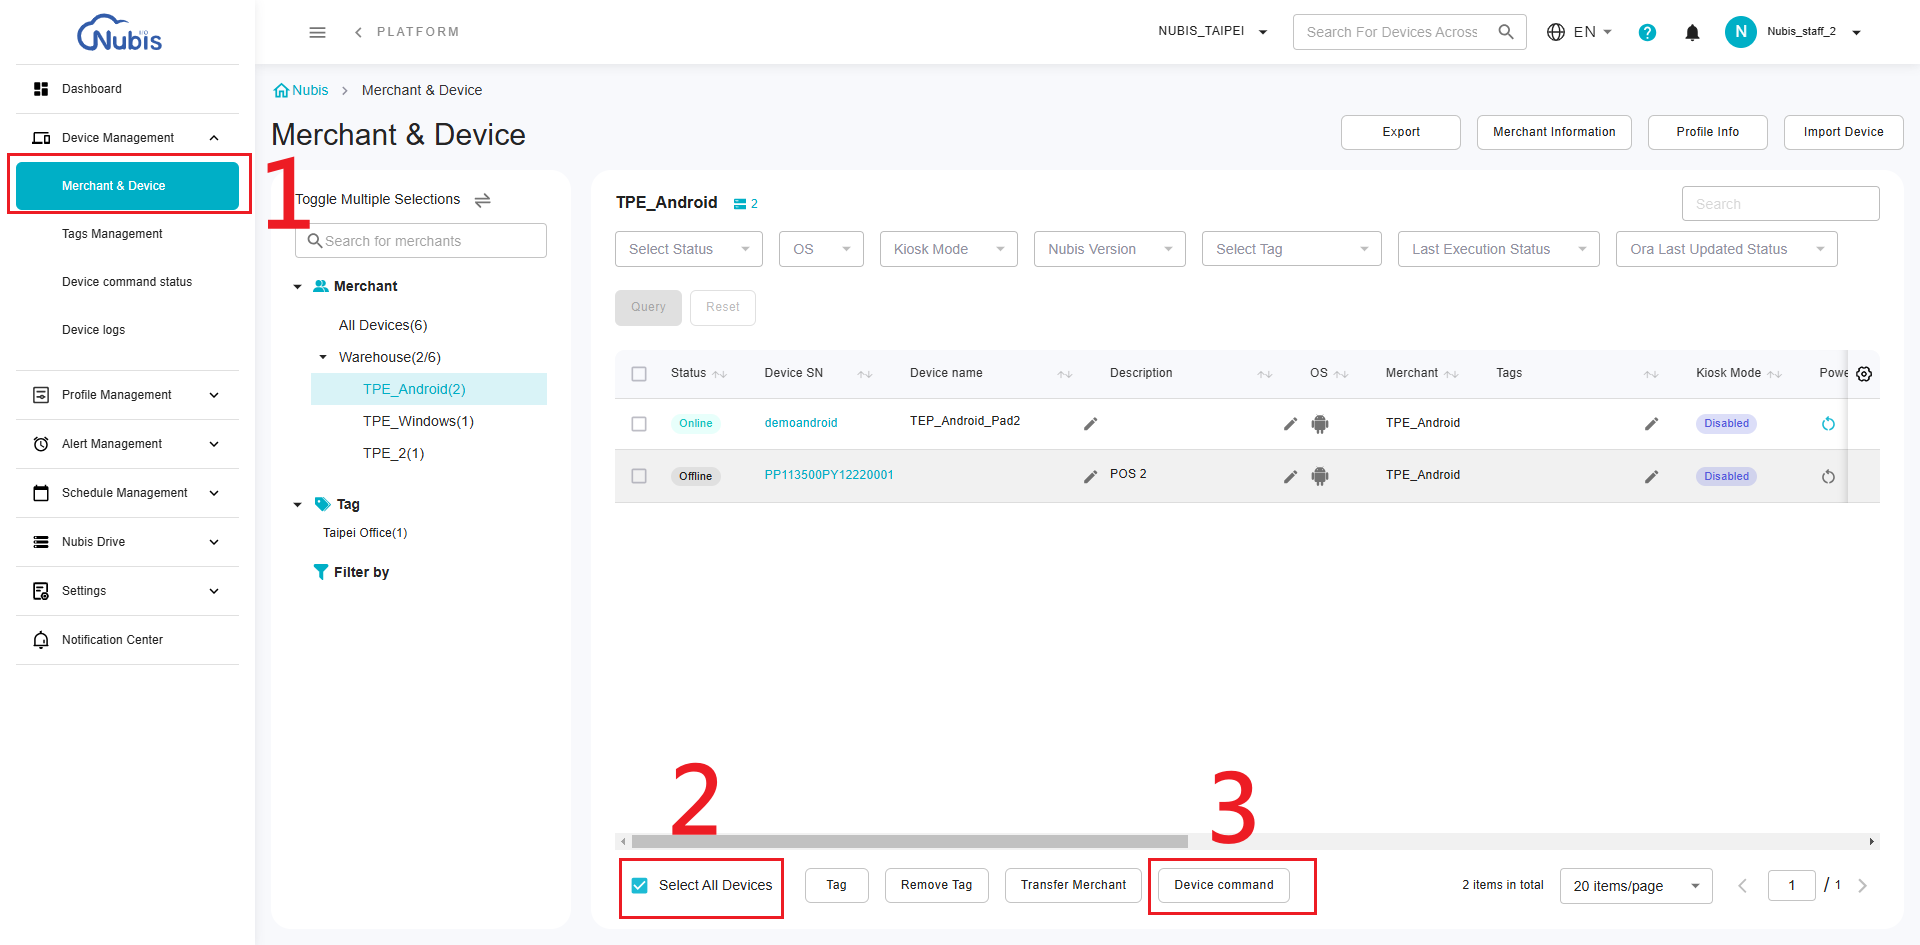
Navigate to the Merchant & Device Page (1)
- Open the "Merchant & Device" section from the Device Management menu.
Select All Devices (2)
- Use the checkbox "Select All Devices" located at the bottom of the device list.
- Note: The "Schedule Setting" command is only activated when this checkbox is selected.
Choose "Device Command" (3)
- Click the "Device Command" button to open the command options.
- Click the "Device Command" button to open the command options.
Select Schedule Setting (4)
- From the displayed command menu, choose "Schedule Setting" to open the scheduling interface.

- From the displayed command menu, choose "Schedule Setting" to open the scheduling interface.
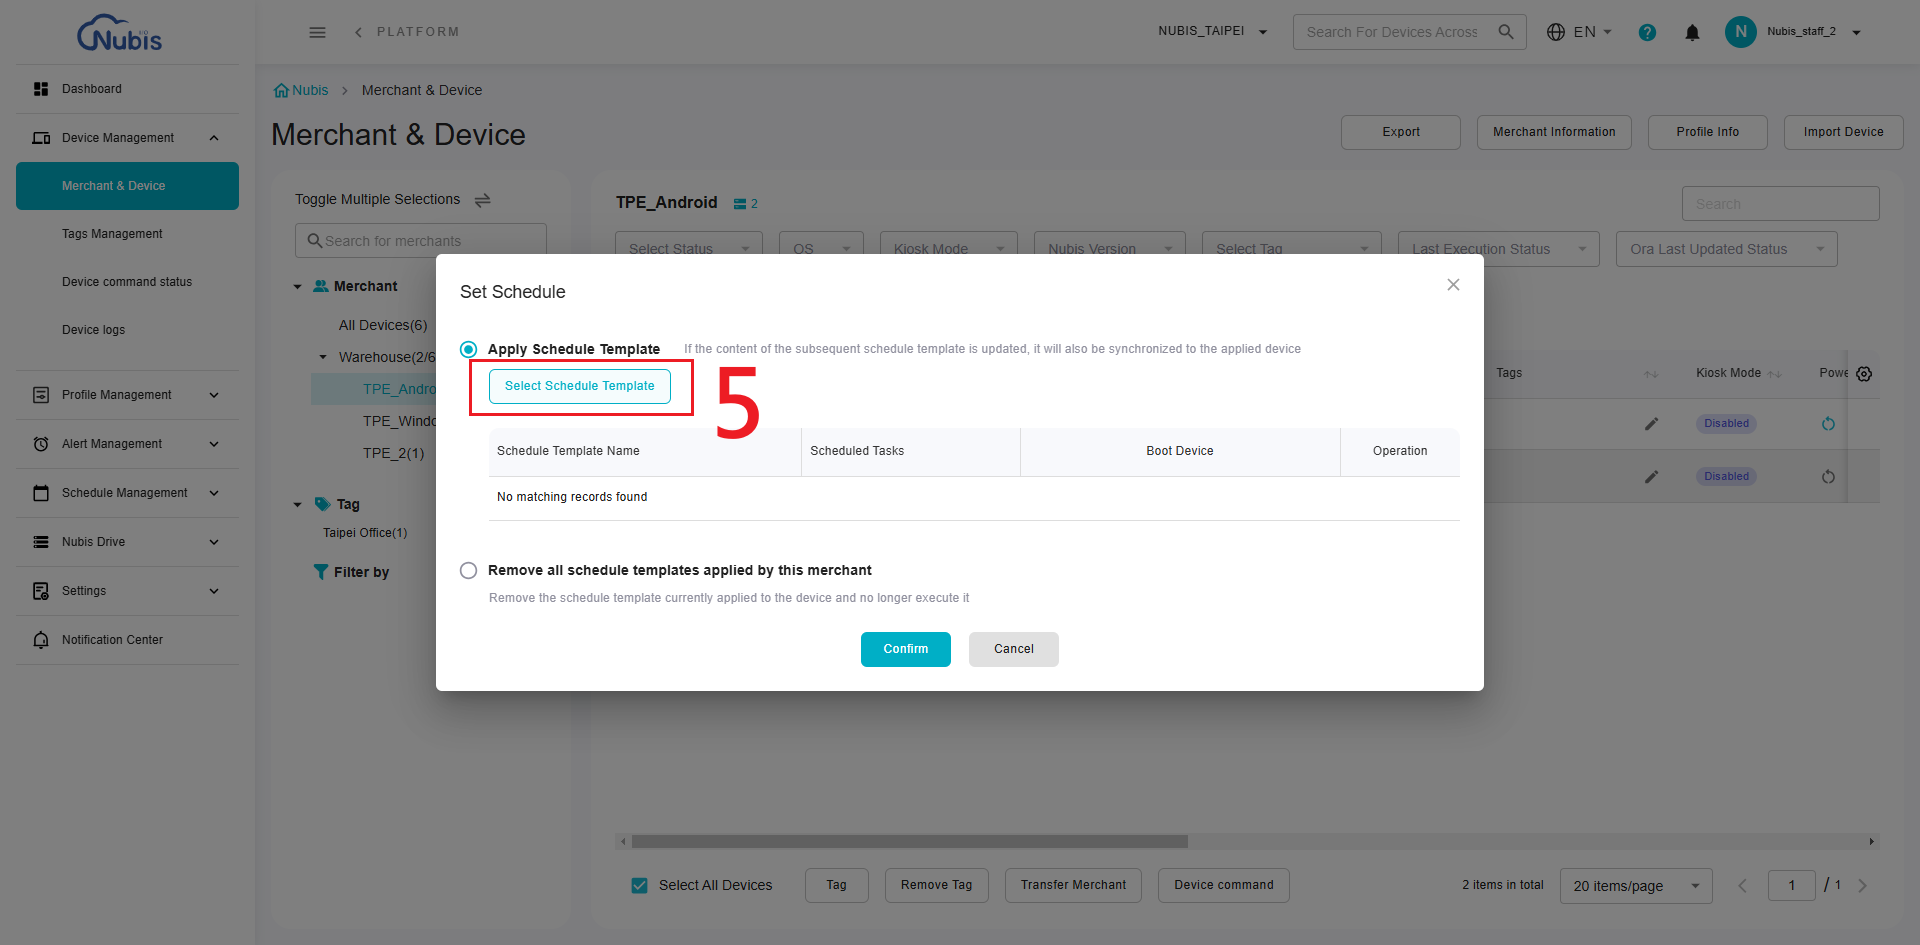
Apply a Schedule Template (5)
- Select the option "Apply Schedule Template" in the pop-up window.
- Click the "Select Schedule Template" button to choose a template.
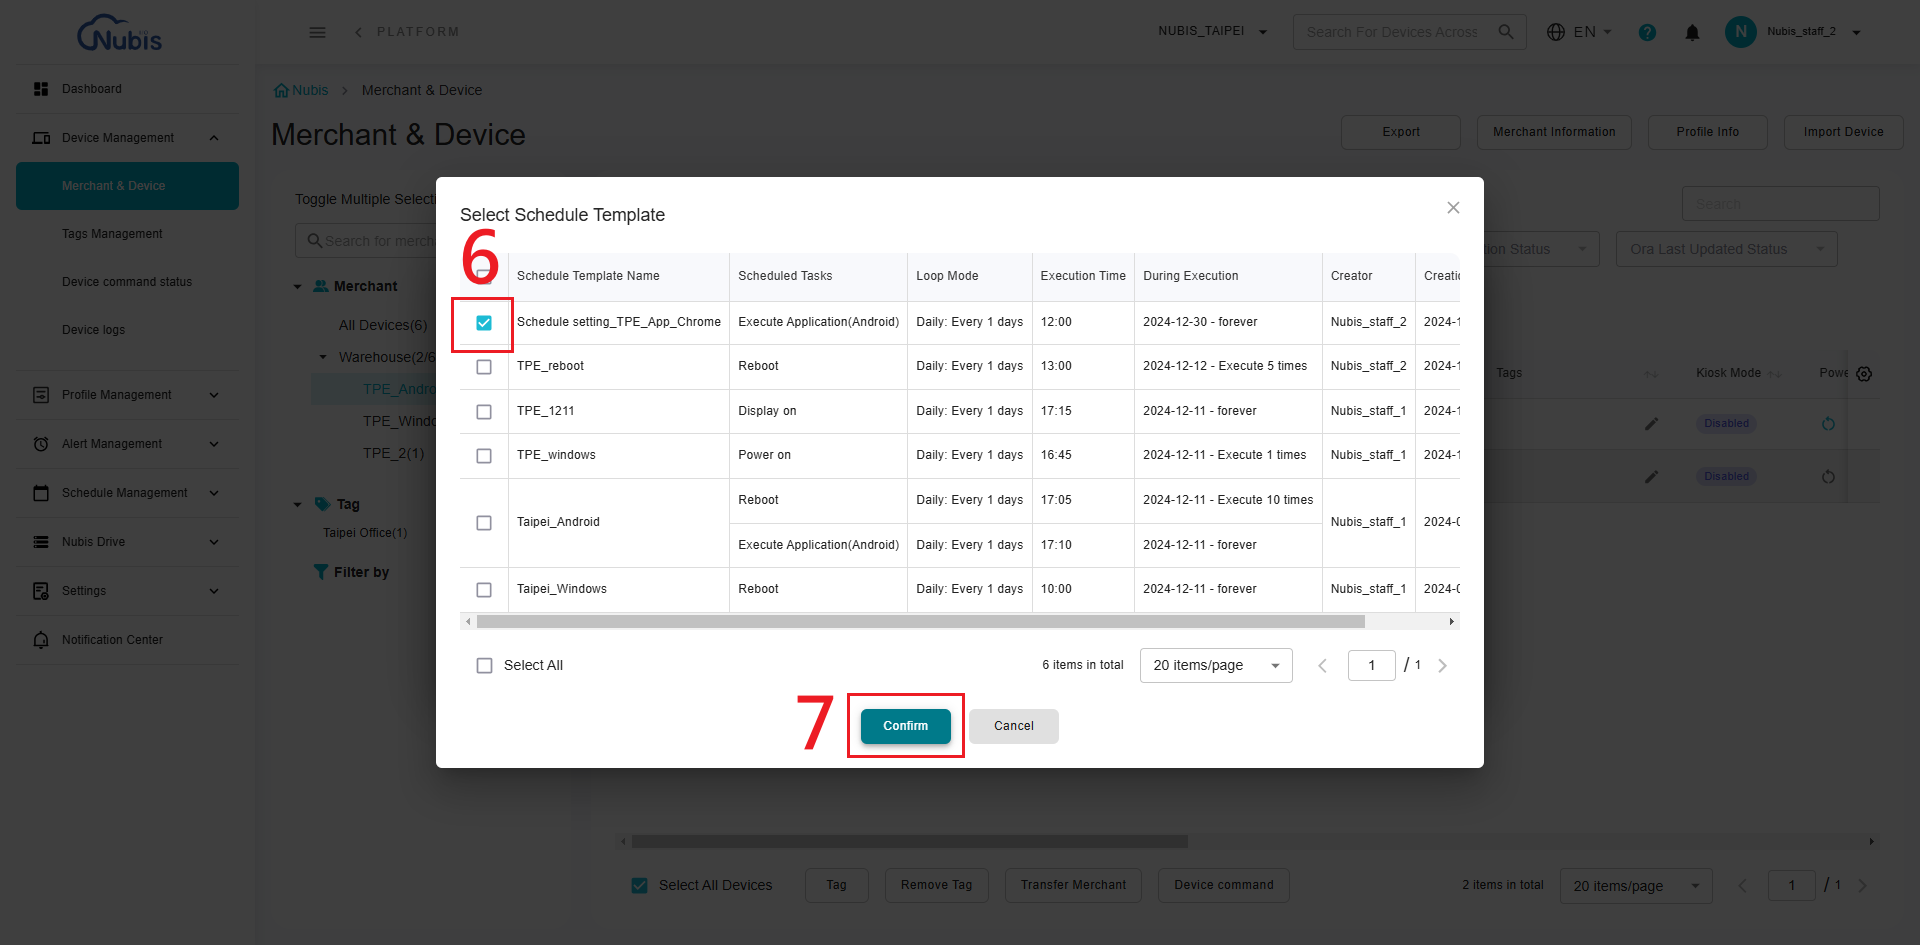
Choose the Template (6)
- From the list of available templates, select the desired schedule template by ticking the checkbox.
Confirm Template Selection (7)
- After selecting the desired template, click the "Confirm" button to proceed.
- After selecting the desired template, click the "Confirm" button to proceed.
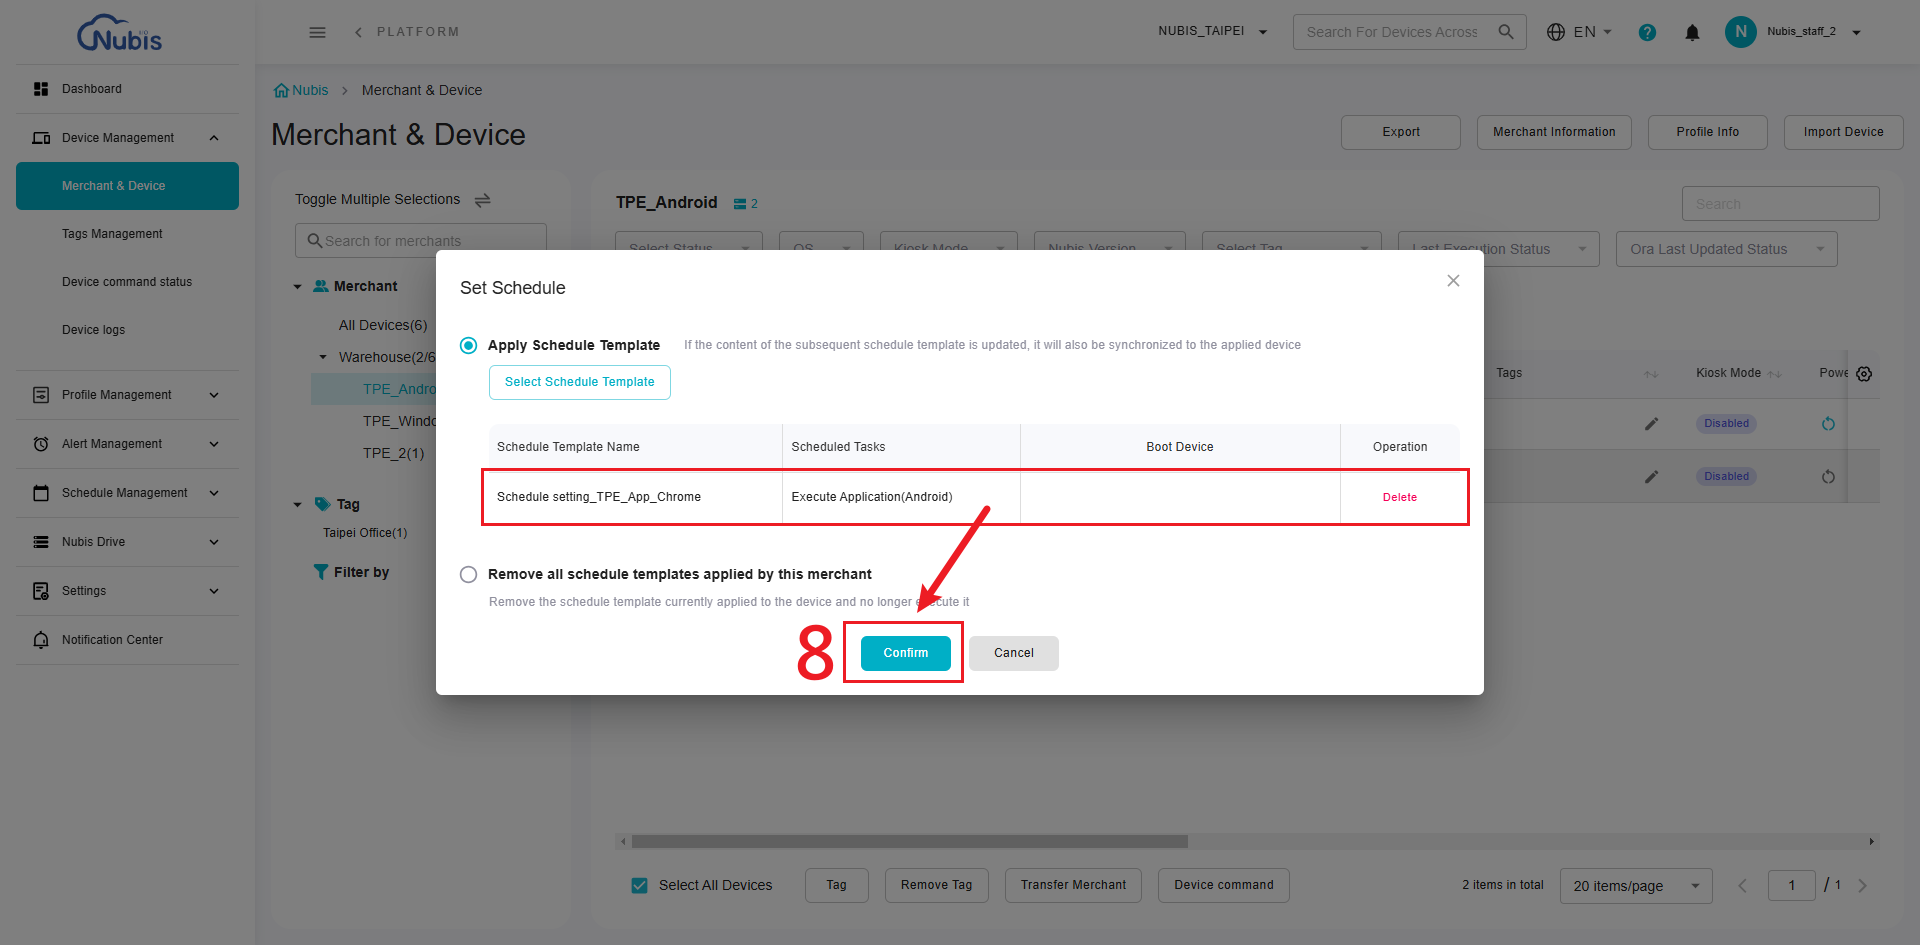
Final Confirmation (8)
- The selected template will now appear in the list of applied templates.
- Click "Confirm" again to finalize and apply the template to the selected devices.
Remove Applied Schedule Templates
Remove All Templates (9)
- In the same "Set Schedule" interface, select "Remove all schedule templates applied by this merchant".
- This action will remove the schedule template currently applied to the devices.
Confirm Removal (10)
- Click "Confirm" to remove the schedule templates.

- Click "Confirm" to remove the schedule templates.
Additional Notes
- Once a schedule template is applied, any updates to the template will automatically synchronize across all devices using it.
- Removing the applied schedule will stop the execution of associated tasks immediately.
Related Articles
Apply/Remove the Alert Template to a Merchant(s)
Go to the Merchant & Device Page Open the Merchant & Device page to manage the devices. Select the Merchant Check "Select All Devices" checkbox to enable the Alert Setting command. (Note: The Alert Setting command is only available when the "Select ...Schedule Template List - Manage all Schedules
Schedule Template List The Schedule Template List allows you to view and manage all schedule templates in a structured table. The functionalities are organized as follows: 1. Schedule Template List View Navigate to the Schedule Template List under ...Introduction of Merchant & Device
Overview The Merchant & Device page allows users to view, manage, and configure devices associated with merchants and tags. Here, features are divided into four key sections, as shown in the screenshot: 1. Merchant and Tag Selection Panel Merchant ...Add an Alert Template
Introduction Alert Management helps you define specific rules to trigger alerts, keeping you informed and proactive about your device conditions. This article will guide you step-by-step on how to create customized alert rules and apply them to ...Apply a Profile to Devices
What is a Profile? A Profile allows users to define system configurations and apply them to one or more merchants. Once applied, all devices under the selected merchants will automatically execute the Profile's settings. This ensures consistent ...